

What is a White Layer?
A white layer is a layer of white ink printed beneath or behind colored ink on non-white materials, such as clear or silver. It acts as a base coat to enhance color vibrancy, create opacity on clear materials, and control the metallic effect on silver substrates—allowing for precise design contrasts and multi-dimensional effects.
Building a White Layer Step by Step
1. Open your art file in Illustrator.
2. Create a new layer and name it “White”.
3. Open the “Swatches” window and create a new Swatch.
4. Name the new Swatch “White” and make sure it’s a spot color.
5. Select all the art from the art layer, then go to “Edit” and choose “Copy”.
6. Click on your white layer, go back to “Edit”, and choose “Paste in Place”.
7. Apply the spot white color to the vector text.
8. Go to the color window and adjust the tint to 0%.
9. Go to the “Attributes” window and click on the “Overprint Fill” box.
10. After all vector metallic objects are adjusted, select any images that need to be metallic and go to the “Links” window. Select your image and edit the original image in Photoshop.
11. In Photoshop, select “Layer”, then “Flatten Image”.
12. Click “Image”, choose “Mode”, and select “Grayscale”.
13. Go to “Image”, choose “Adjustments”, and select “Invert”.
14. Go to “Image”, “Adjustments”, and select “Levels”. Adjust the dark arrow to the right, to make sure all black is 100% black, and adjust the white arrow to the left, so that all white is 100% white.
15. Click “File”, and choose “Save As”. Under format select “TIFF” and include “White” in the file name.
16. Go back to Illustrator. Select the image on the white layer and relink the image.
17. Select your new white image and click “Place”.
18. While your white image is still selected, go to the “Swatches” window and click on the spot white color to apply to your image.
19. Go to the “Attributes” window and check the “Overprint Fill” box. Make sure that all objects on your white layer are set to “Overprint Fill” or “Overprint Stroke”.
How White Layers Are Printed

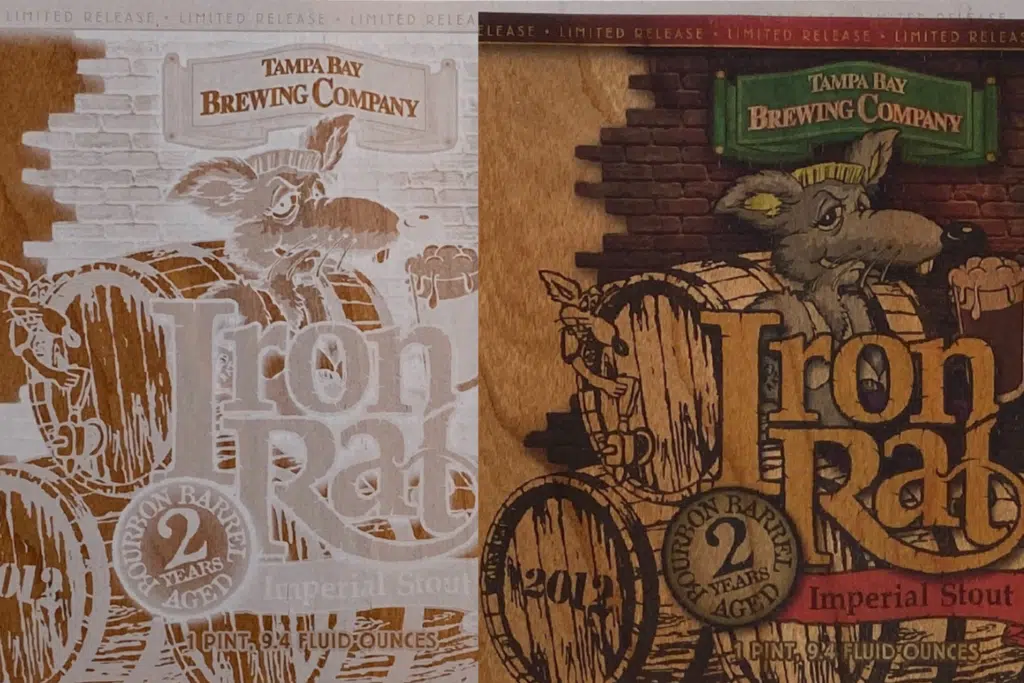
Silver Substrate
No ink applied

White Layer Printed
White Layer of ink applied to the entire substrate, except areas where a metallic finish is desired

Finished Label
Full ink coverage displaying art over the white layer
Ready to Print Your Custom Labels?
Gallery
Print Types


